Animating SVGs with A Little Bit of Math
How the Interactive Background Works
Move your pointer · Click for a rippleTap the header for a ripple
Introduction
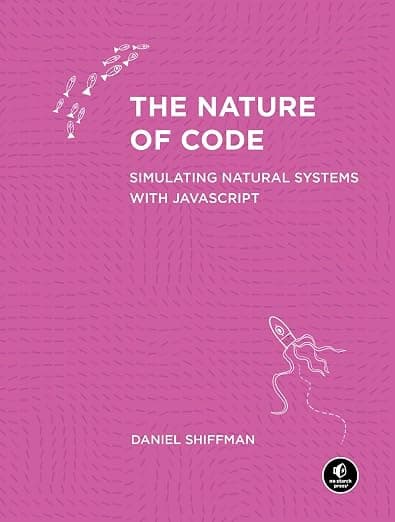
I recently purchased Nature of Code and wanted to recreate the cover pattern with a ripple effect animation that responds to mouse hover.
Hover over this post’s header to see the lines animate toward the mouse. This pattern originally appeared behind every post on my old blog.
Additionally, all of the code is open source, if jumping to the code implementation is more your style.
The more interesting part of the animation is the rotation calculation and the smooth animation of the SVG lines.
Setting Up the Canvas
The animation is on an SVG canvas that fills the entire width of the container and 70% of the viewport height, and is absolutely positioned at the top of the page.
<svg
  style={{ position: 'absolute', top: 0, left: 0, width: '100%', height: '70vh' }}
  ref={svgRef}
  width="100%"
  viewBox="0 0 100 100"
  preserveAspectRatio="xMidYMid slice"
  onMouseMove={handleMouseMove}
  onMouseLeave={handleMouseLeave}
>
The
preserveAspectRatioattribute is set toxMidYMid sliceto ensure the SVG fills the entire container while maintaining its aspect ratio.sliceis used to ensure the SVG is cropped to fit the container.xMidYMidis used to center the SVG within the container.
The Line Object
Each line in the grid is represented by an object with the following properties:
interface Line {
  /** The x position of the line */
  x: number;
  /** The y position of the line */
  y: number;
  /** The current rotation of the line */
  rotation: number;
  /** The target rotation of the line */
  targetRotation: number;
  /** The color of the line */
  color: string;
}
Interaction and a Little Bit of Math
The interactivity lies in the rotation calculation during mouse hover. When the mouse moves, the component calculates the angle between each line and the mouse position.
Geometry and Trigonometry
Distance between two points is calculated using the Euclidean distance formula, which is the square root of the sum of the squares of the differences in the coordinates.

This is also known as the Pythagorean distance.
Next, we calculate the distance between the mouse and the line.
// Calculate the distance between the mouse and the x position of the line
const dx = mousePos.x - line.x;
// Calculate the distance between the mouse and the y position of the line
const dy = mousePos.y - line.y;
// Calculate the distance between the mouse and the line
//  √((-dx)² + (-dy)²) - Euclidean distance
const distance = Math.sqrt(dx * dx + dy * dy);
const maxDistance = 10; // Max distance of effect

// If the distance between the mouse and the line is less than the max distance, and the mouse is not at the edge of the screen, then we calculate the angle between the mouse and the line
if (distance < maxDistance && mousePos.x !== -1 && mousePos.y !== -1) {
  // Calculate the angle between the mouse and the line
  // atan2(dy, dx) returns the angle in radians between the positive x-axis and the point (dy, dx)
  const angle = Math.atan2(dy, dx) * (180 / Math.PI);
  newTargetRotation = angle;
}
Using the atan2 function, which returns the angle in radians between the positive x-axis and the point given by the coordinates (dy, dx), we specifically use Math.atan2(dy, dx) to get the angle between the mouse and the line on a Cartesian plane to generate the new rotation of the line.
Then, we convert radians to degrees for easier manipulation by multiplying by (180 / Math.PI).
Smooth Animation
To create a smooth animation, the component doesn't immediately set the line to its target rotation, but gradually moves towards it.
const rotationDiff = newTargetRotation - line.rotation;
// 0.1 is the speed of the line rotation to its target rotation
const newRotation = line.rotation + rotationDiff * 0.1;
Performance Considerations
To ensure smooth performance, especially on lower-end devices, the component employs two key strategies:
- Debouncing: The window resize event is debounced to prevent excessive recalculations. I don't really think users are going to be resizing their browser window that often, but generally, on the safe side, it's a good idea to debounce the event.
// Using lodash's debounce function would probably be better lol
function debounce(func: Function, wait: number) {
  let timeout: number;
  return function (this: any, ...args: any[]) {
    const context = this;
    clearTimeout(timeout);
    timeout = window.setTimeout(() => func.apply(context, args), wait);
  };
}

/**
 *
 * @param callback fn
 * @param delay
 * @returns debouncedFn
 */
function useDebounce(callback: Function, delay: number) {
  // Make sure the debounce function is only created once
  // and not recreated on every render
  const debouncedFn = useRef(debounce(callback, delay)).current;
  return debouncedFn;
}- RequestAnimationFrame: The animation loop uses
requestAnimationFramefor smooth, optimized updates at 60fps: